Here's a short tutorial on how to make craters, rocks and sandy surfaces for models. Putty used is "green stuff" epoxy putty, sold by Games Workshop. Glue is regular wood glue, thinned out with water, and the sand is small grain (think I bought it from a modelling store).
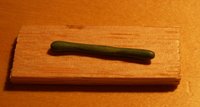 Start off with a piece of putty that you make into a string.
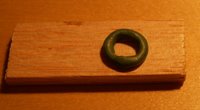 Connect the ends, this will be the crater rim.
 Form the in- and outside of the crater rim.
 Take a piece of putty, approximately the size of the rock you want to make.
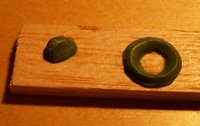 Form the rock's appearence, if you're making a lunar surface make the edges soft and rounded (you can have a look at some Apollo pictures for reference if you wanna be picky).
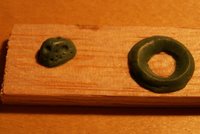 Since this was a moon rock I made some small crater impacts on it by using a needle for the smallest, a toothpick for the medium craters, and the rounded end of a painting brush for the large craters.
 I use a brush for "painting" on the glue, since it's thinned down with water it's easy to brush down.
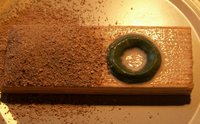 Sprinkle on the sand.
 On the whole base...
 Shake off the excess and let dry unless you're in a rush, works fine even if you dont leave it to dry.
 Apply some more glue, if you find that you're brushing away the sand that's already on the base, thin out the glue a bit more, so that you dont have to brush it on, but can just dip the brush gently on the base and the glue will spread down on its own.
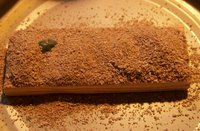 Another layer of sand.
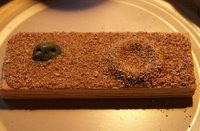 Shake off...
 And with 2 layers of sand on the base I applied one last layer of glue, and left to dry.
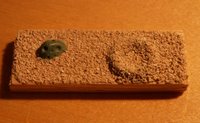 Like so, I put on the last layer of glue so that nothing comes off when I paint it.
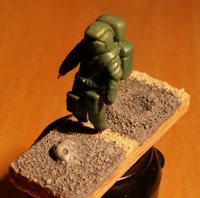 And here you can see the painted version (I was taking pics of the astronaut figure, but the other pics of the base didnt turn out as well as this one, so there ya go).
When painting the bases I start out with a dark base colour, then lighten it a bit, but instead of doing proper painting I gently brush it over the surface, so that only the heightened areas get painted. When starting out I usually brush a bit heavier, then lighten the paint and brush more gently. Depending on how much depth you want in the surface you can increase the number of times you lighten the paint, I do at least three, usually toward four or five, it gives a nice shading effect.
 Start off with a piece of putty that you make into a string.
 Connect the ends, this will be the crater rim.
 Form the in- and outside of the crater rim.
 Take a piece of putty, approximately the size of the rock you want to make.
 Form the rock's appearence, if you're making a lunar surface make the edges soft and rounded (you can have a look at some Apollo pictures for reference if you wanna be picky).
 Since this was a moon rock I made some small crater impacts on it by using a needle for the smallest, a toothpick for the medium craters, and the rounded end of a painting brush for the large craters.
 I use a brush for "painting" on the glue, since it's thinned down with water it's easy to brush down.
 Sprinkle on the sand.
 On the whole base...
 Shake off the excess and let dry unless you're in a rush, works fine even if you dont leave it to dry.
 Apply some more glue, if you find that you're brushing away the sand that's already on the base, thin out the glue a bit more, so that you dont have to brush it on, but can just dip the brush gently on the base and the glue will spread down on its own.
 Another layer of sand.
 Shake off...
 And with 2 layers of sand on the base I applied one last layer of glue, and left to dry.
 Like so, I put on the last layer of glue so that nothing comes off when I paint it.
 And here you can see the painted version (I was taking pics of the astronaut figure, but the other pics of the base didnt turn out as well as this one, so there ya go).
When painting the bases I start out with a dark base colour, then lighten it a bit, but instead of doing proper painting I gently brush it over the surface, so that only the heightened areas get painted. When starting out I usually brush a bit heavier, then lighten the paint and brush more gently. Depending on how much depth you want in the surface you can increase the number of times you lighten the paint, I do at least three, usually toward four or five, it gives a nice shading effect.